Dual Battery System Installation Guide
Upgrade to a Dual Battery System:
Compatibility: All Rover variants use the Rover Pro battery as the secondary unit.
Mounting: Installs directly onto the topside of the downtube (Dirodi decal tube).
Selection: Ensure you choose the kit with same voltage (48V or 52V) that matches your current bike's main battery.
This particular guide is for installation of the kit to a Rover Gen1-6
If you need Rover Pro guide instead, see here: https://dirodi.com.au/knowledge/article/847
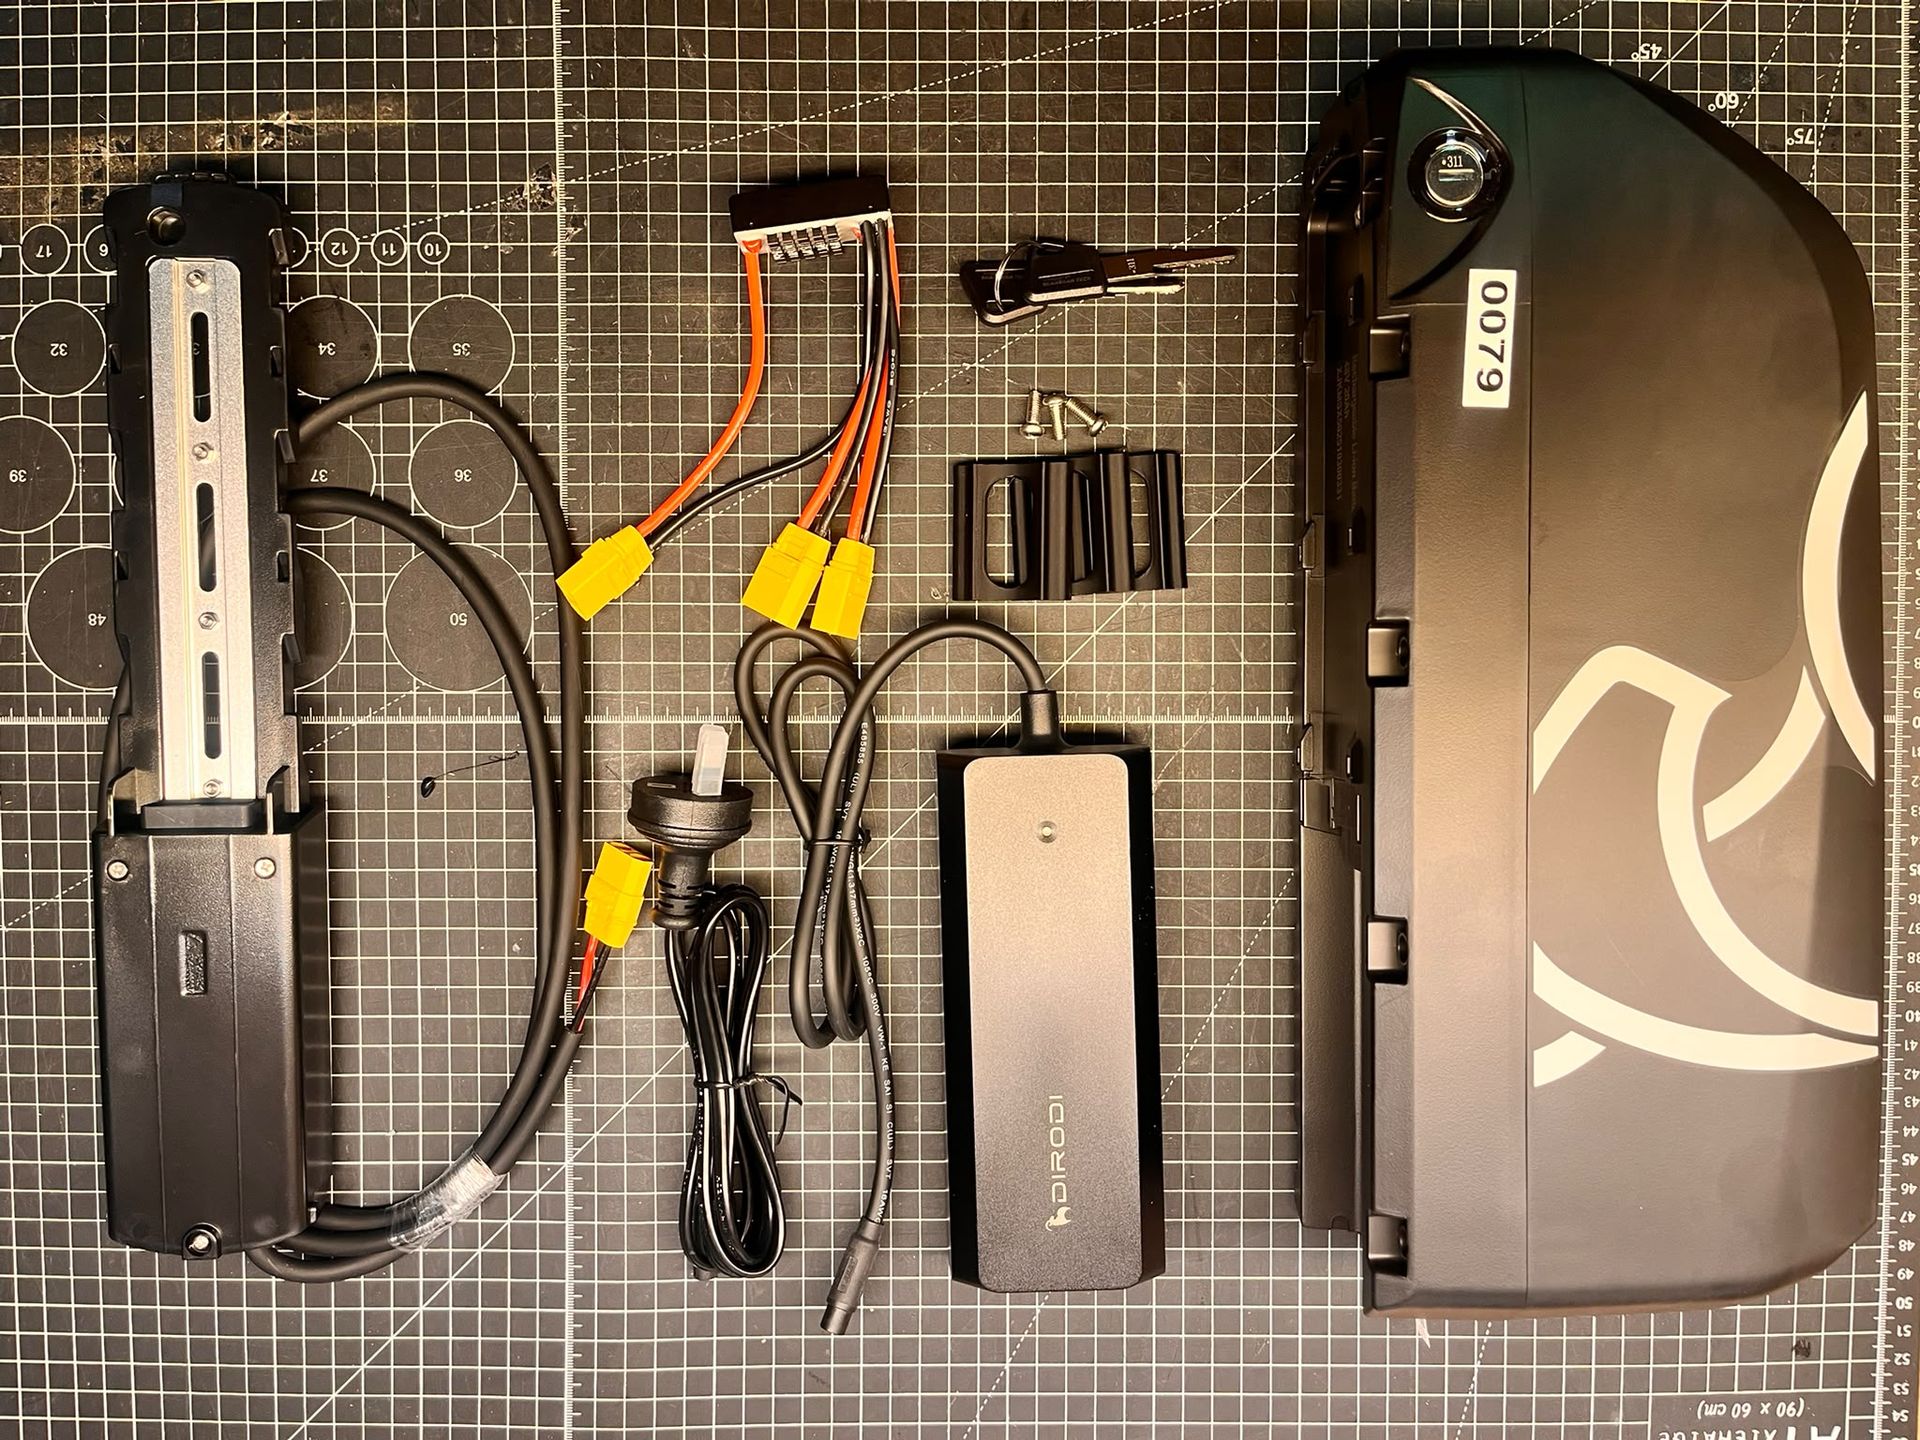
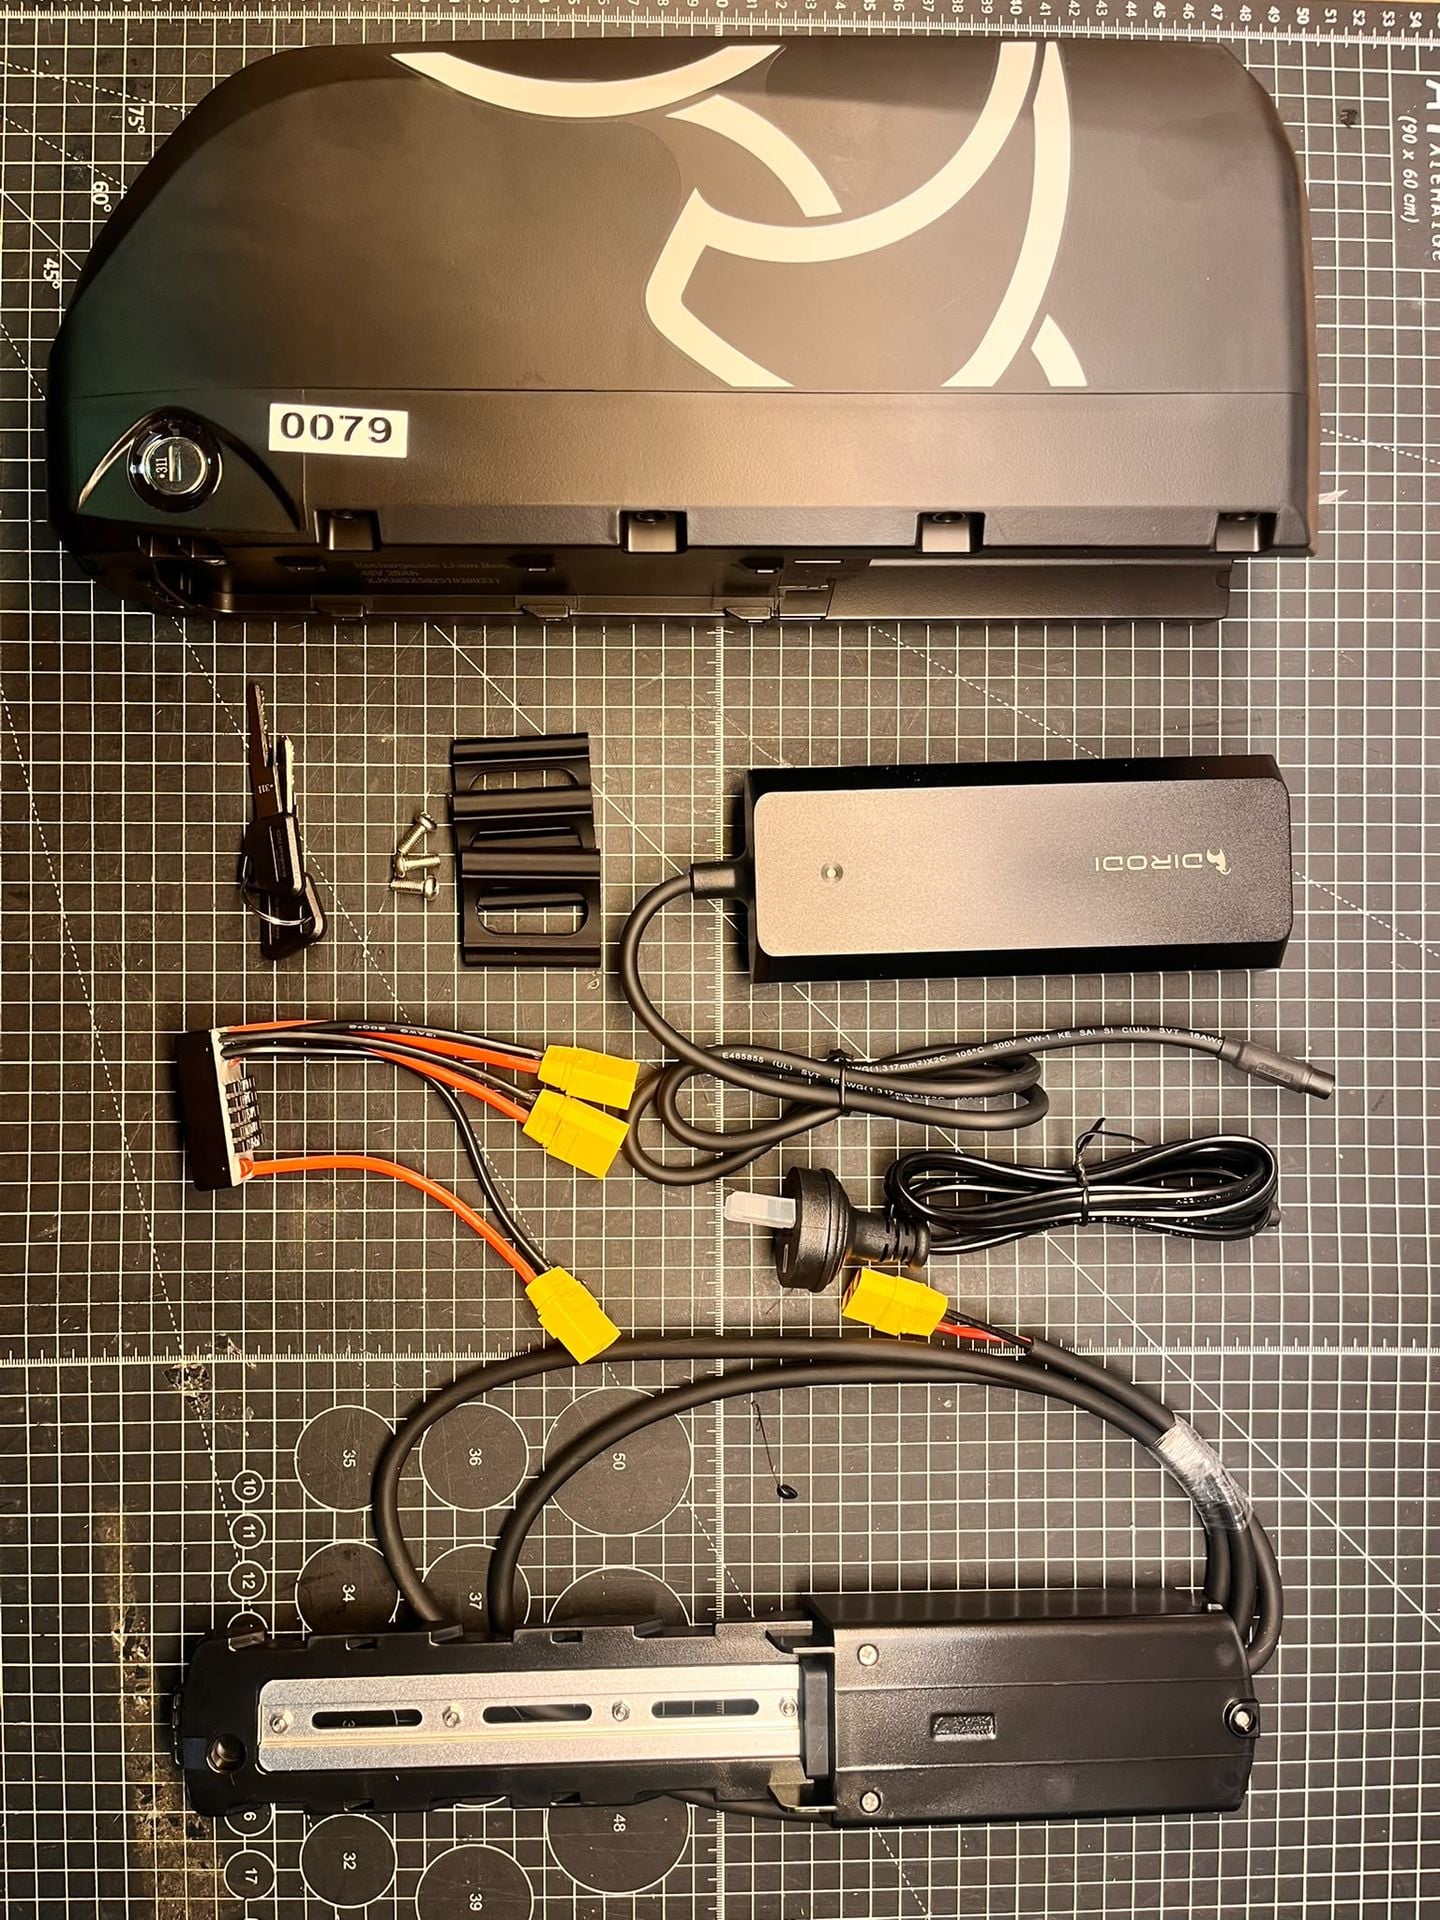
Contents:
-1PCS Battery
-1PCS Battery Base with extended cable
-1PCS Charger
-1PCS Battery Balancer
-3PCS Battery Base Shims
-3PCS Mounting Bolts
Tools needed:
-10mm wrench/socket
-Zip ties, medium size x5
-Cutters
-Phillipshead screwdriver
-Electric tape (optional)
-Threadlock, blue/red (optional)
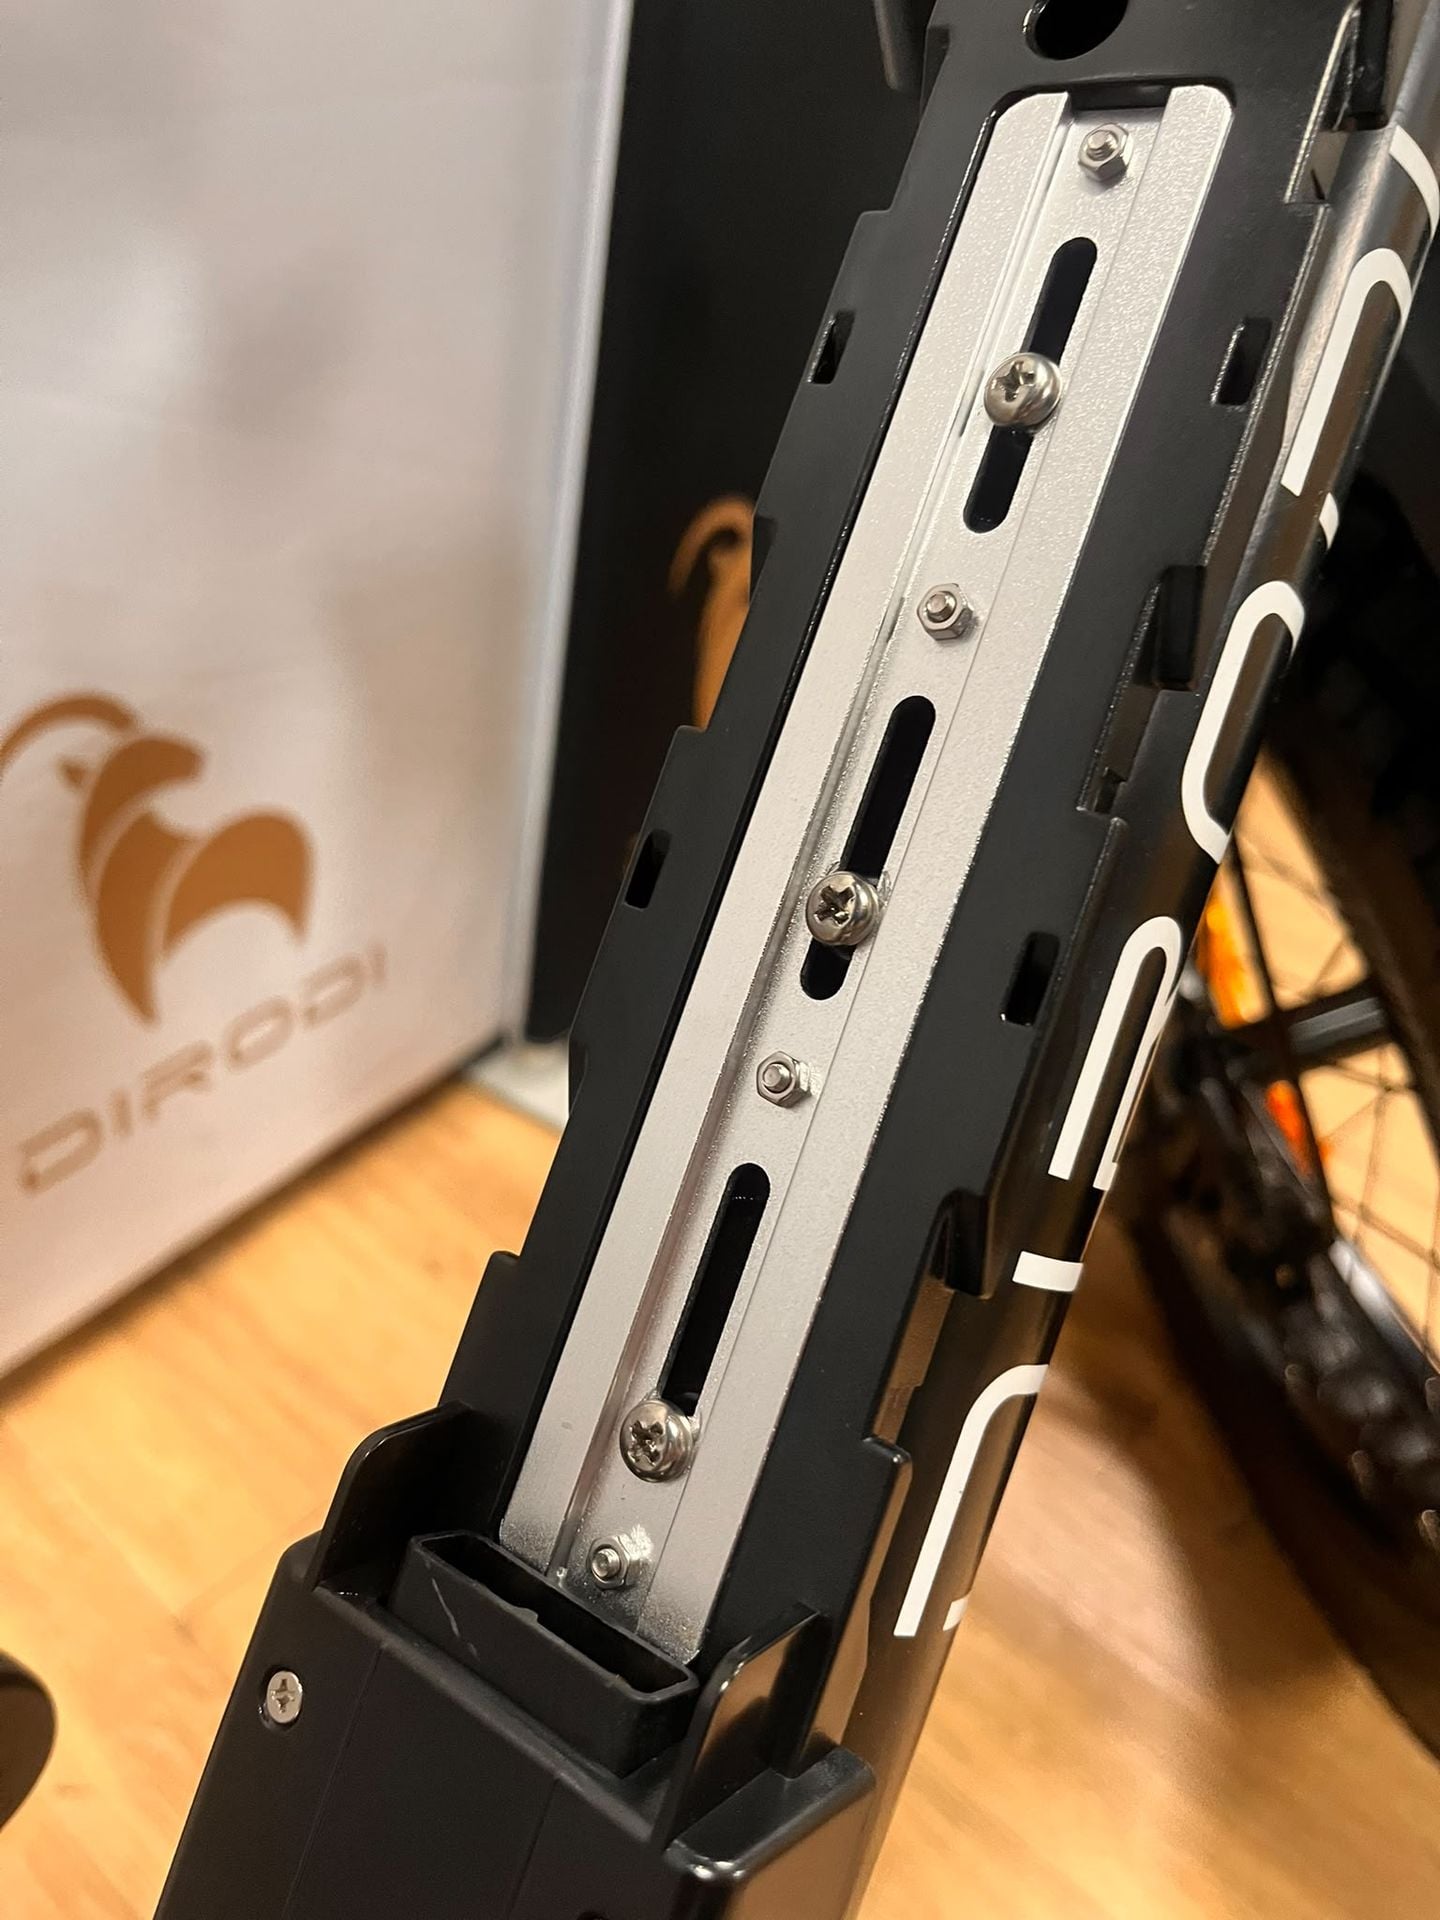
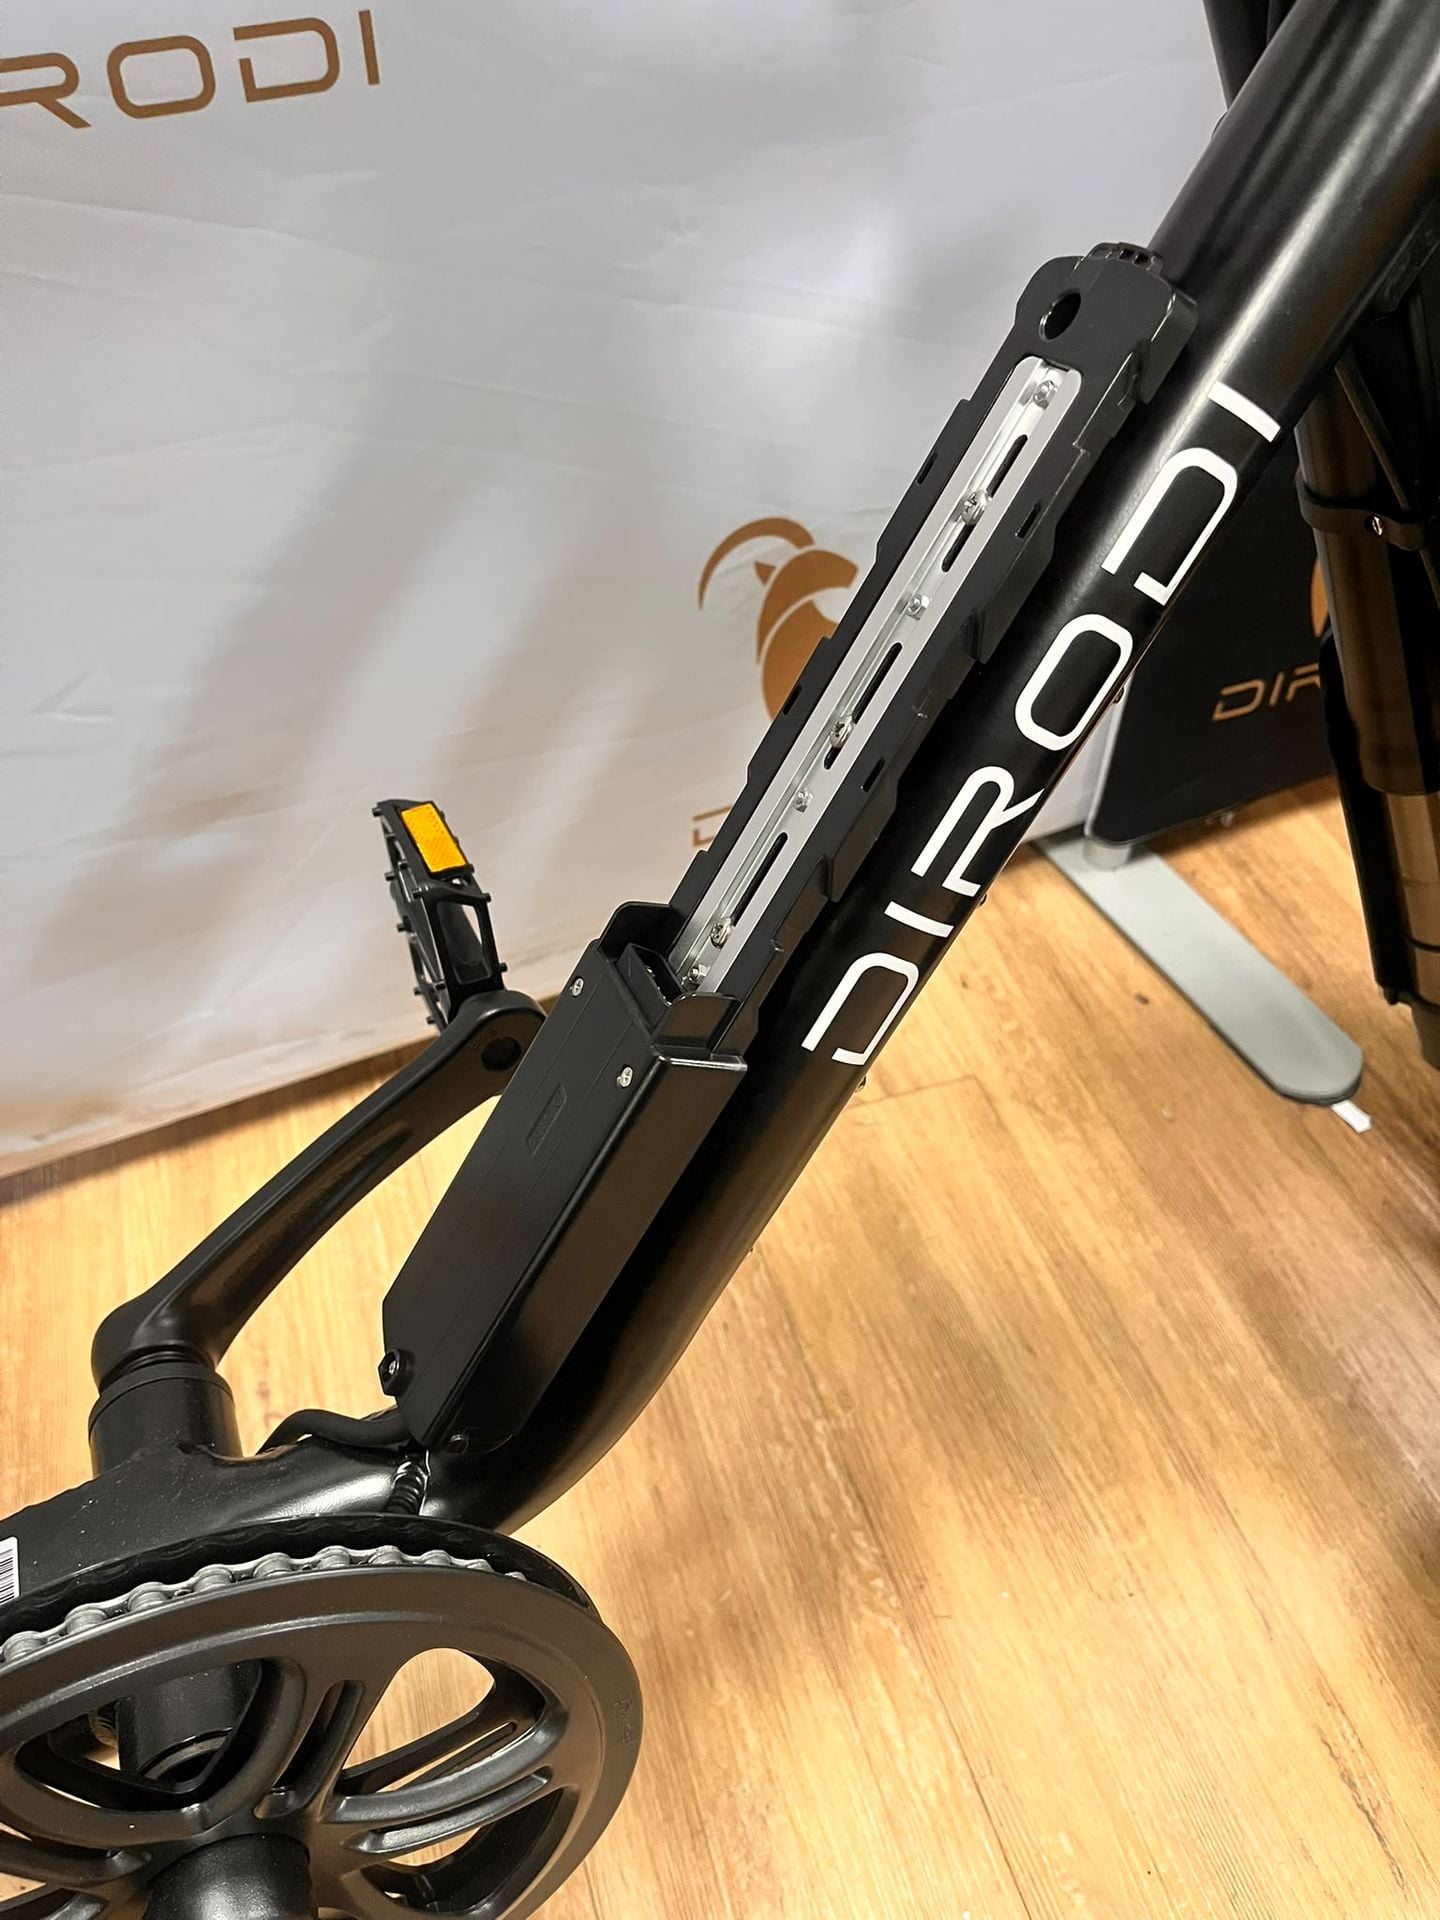
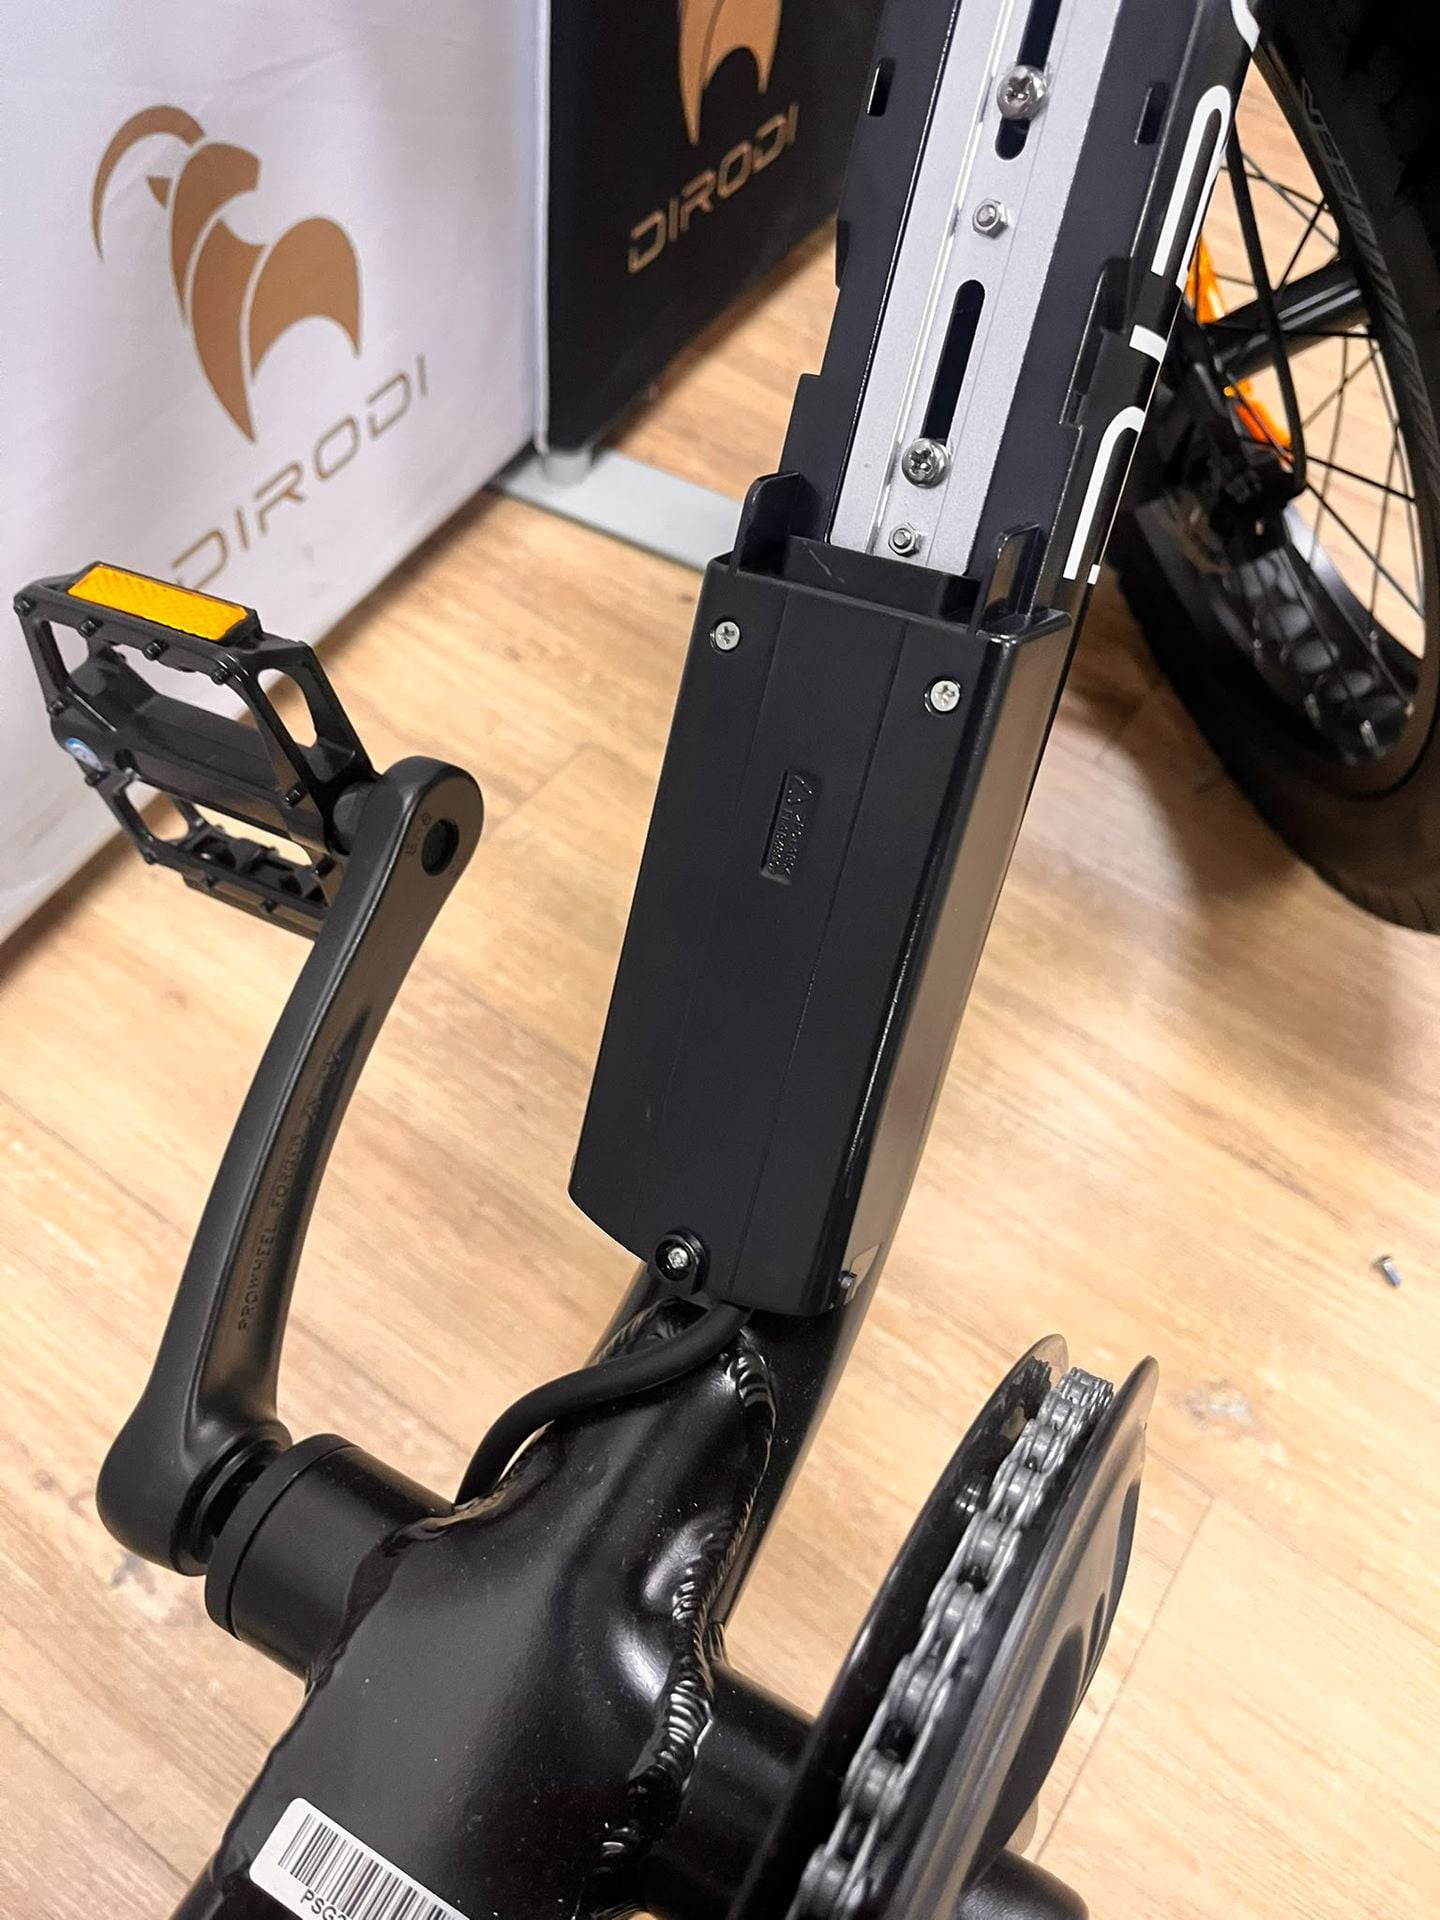
Step 1: Mount Battery Base to Downtube
-Remove main battery from the bike to begin
-Remove all downtube frame bolts (top side)
-Step over frame, use all 3 plastic 3D printed shims to support battery base, secure with supplied bolts (bolt heads are shallower than the removed frame bolts) Mount using the top 3 mounting points, leave bottom mounting point without any frame bolt, see image 4.
-Line up the battery base to secure with all 3 bolts, see image 2 for position.
-Step Thru frame, use only 2 shims - as the step thru downtube support bar, need to move battery base up by 1 hole. The top mounting section on battery base for step thru will not be used.
-(Optional) Secure bolts with threadlock, extra service life to ensure they do not come loose.
-Do not over tighten the mounting bolts, to avoid cracking the plastic shims. Torque 8nm force. Ample tightness. Advise threadlock for step thru.
-Power cable to be routed later in the later steps![]()
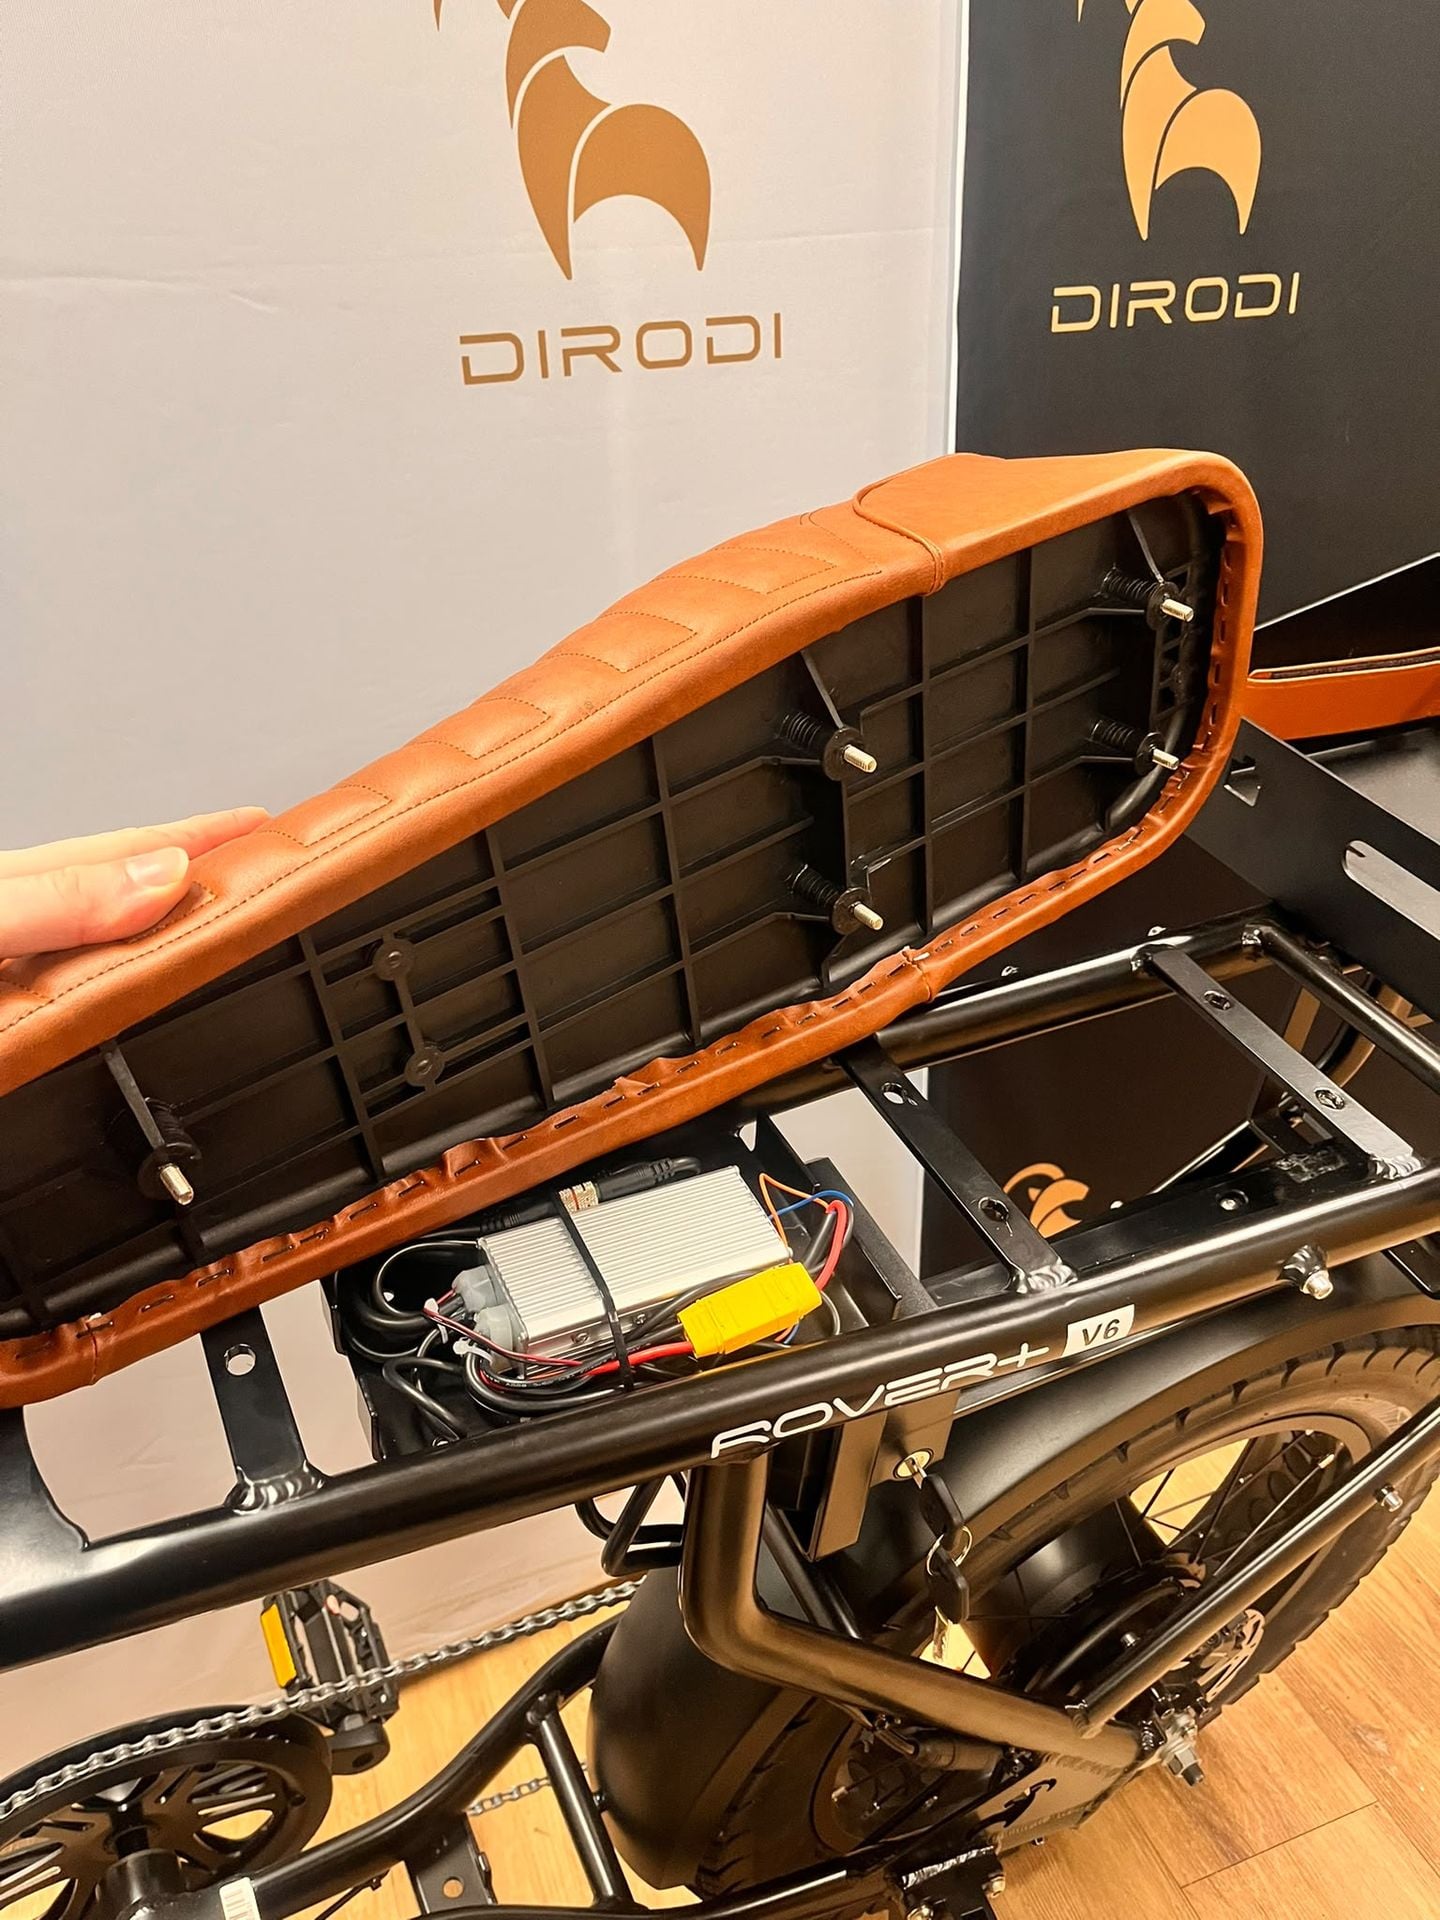
Step 2: Remove Seat to access controller bay
-Remove seat to access controller bay for Rover Gen1-6 on the underside of the seat, with 10mm wrench/socket.
-Unplug the XT90 yellow connector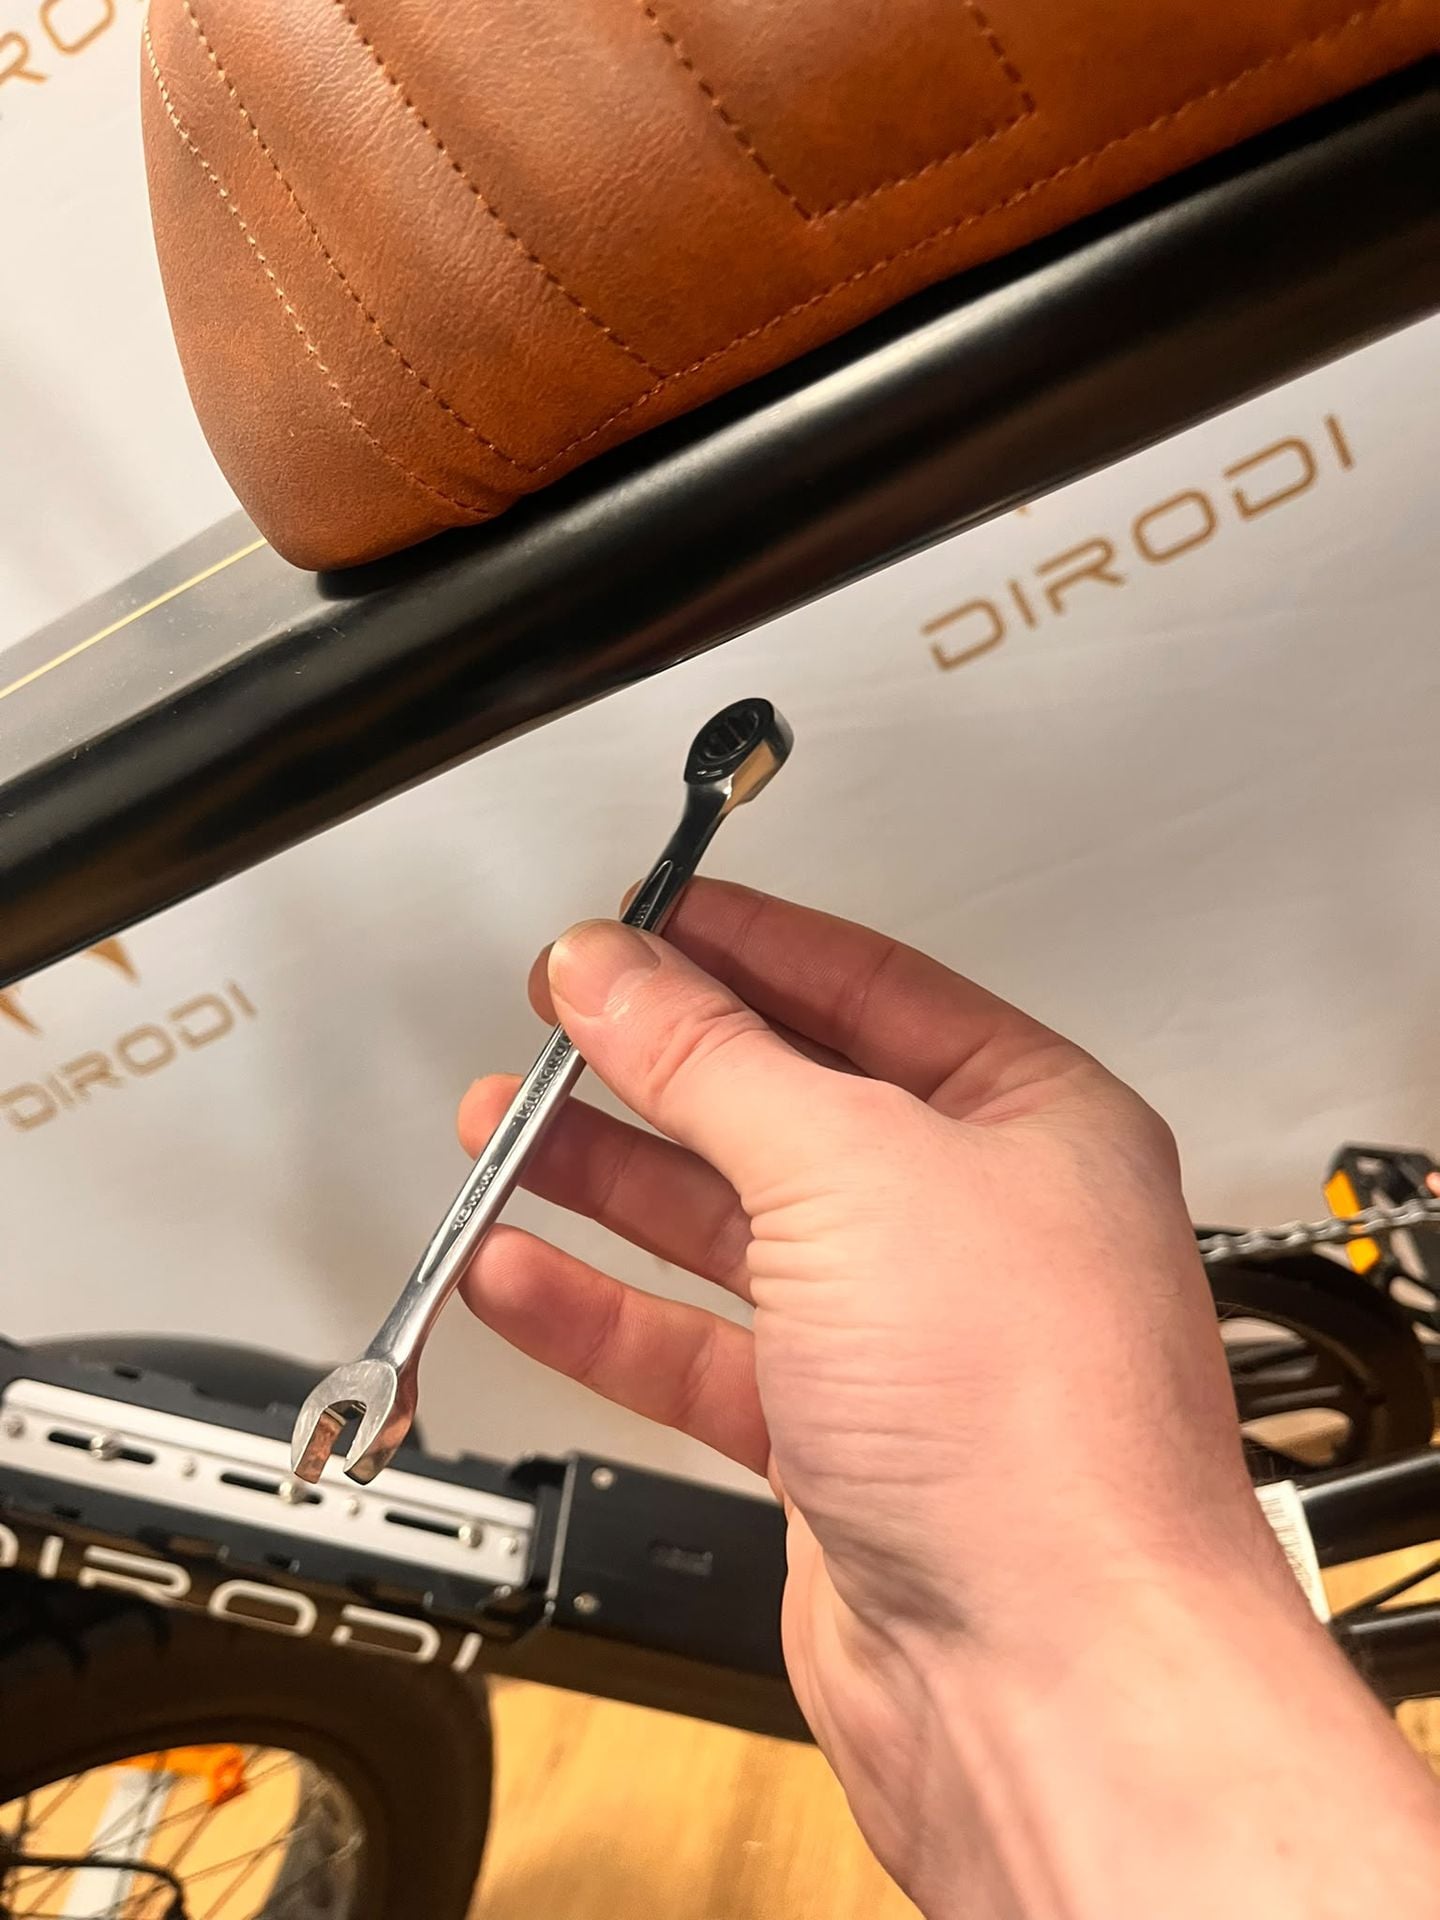
Step 3: Cable Routing and Cable Management
-See image with red circles marked out, these are the 2nd battery cable zip tie points. Cut all original zip ties for the cable routing as shown, start to attach the 2nd battery power cable 1 zip tie at a time to get a tight fit. Note: when looping around the Dirodi ram triangle near rear wheel to ensure all original cables have been resecured: Motor cable, PAS sensor cable and new 2nd battery power cable.
-Route the 2nd battery power cable to the controller bay (Pull the connector through hole in controller bay as shown, or if no hole found on your generation, loop through the front opening to controller bay)
-Once the cable routing is complete, prepare the battery balancer in next step.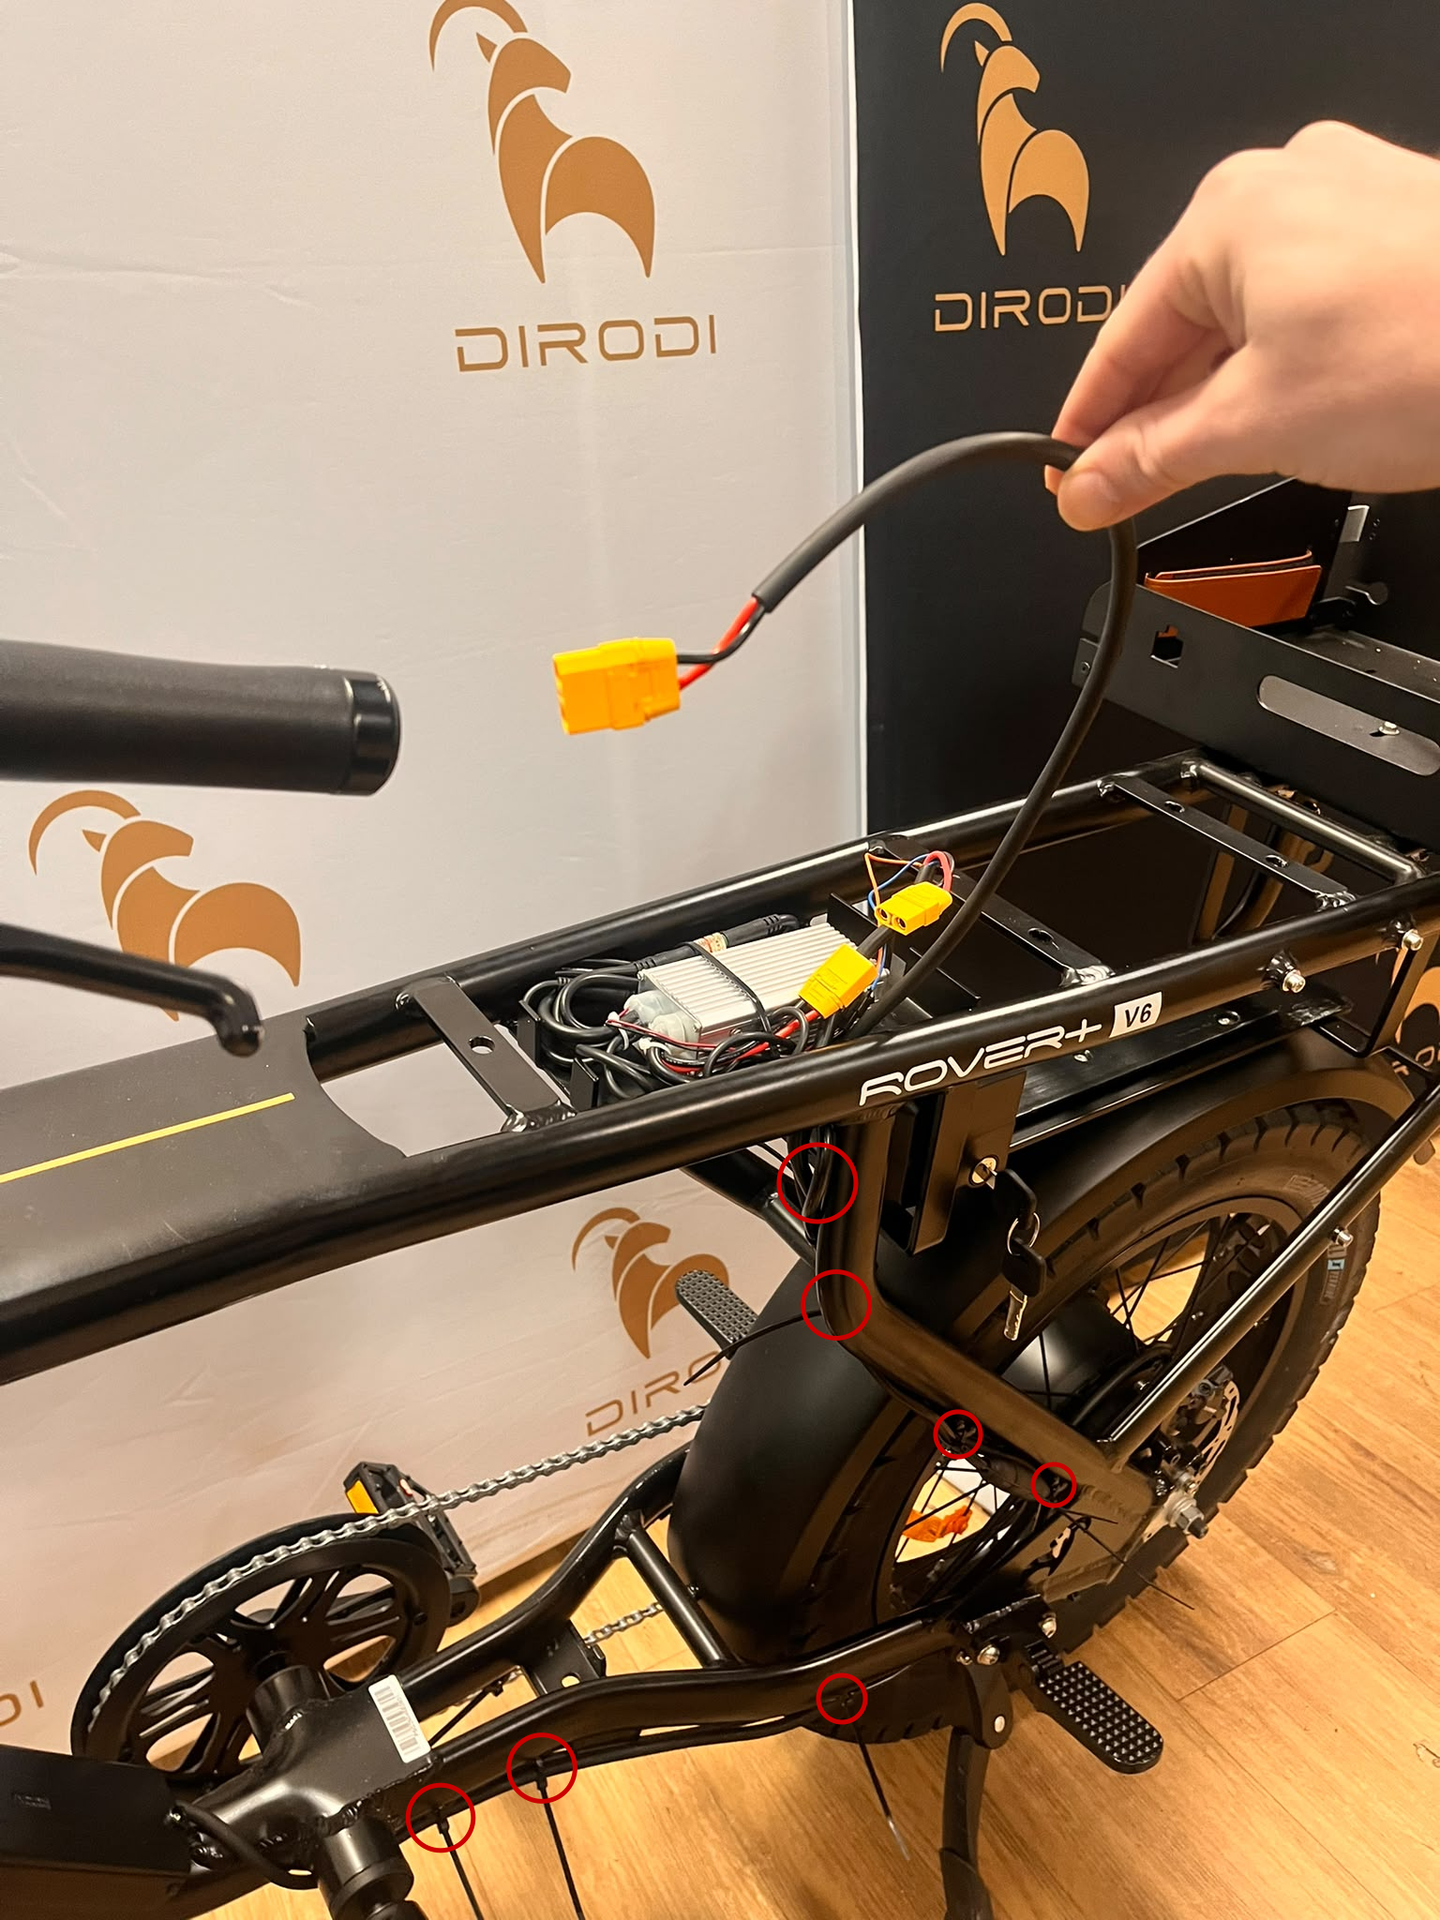
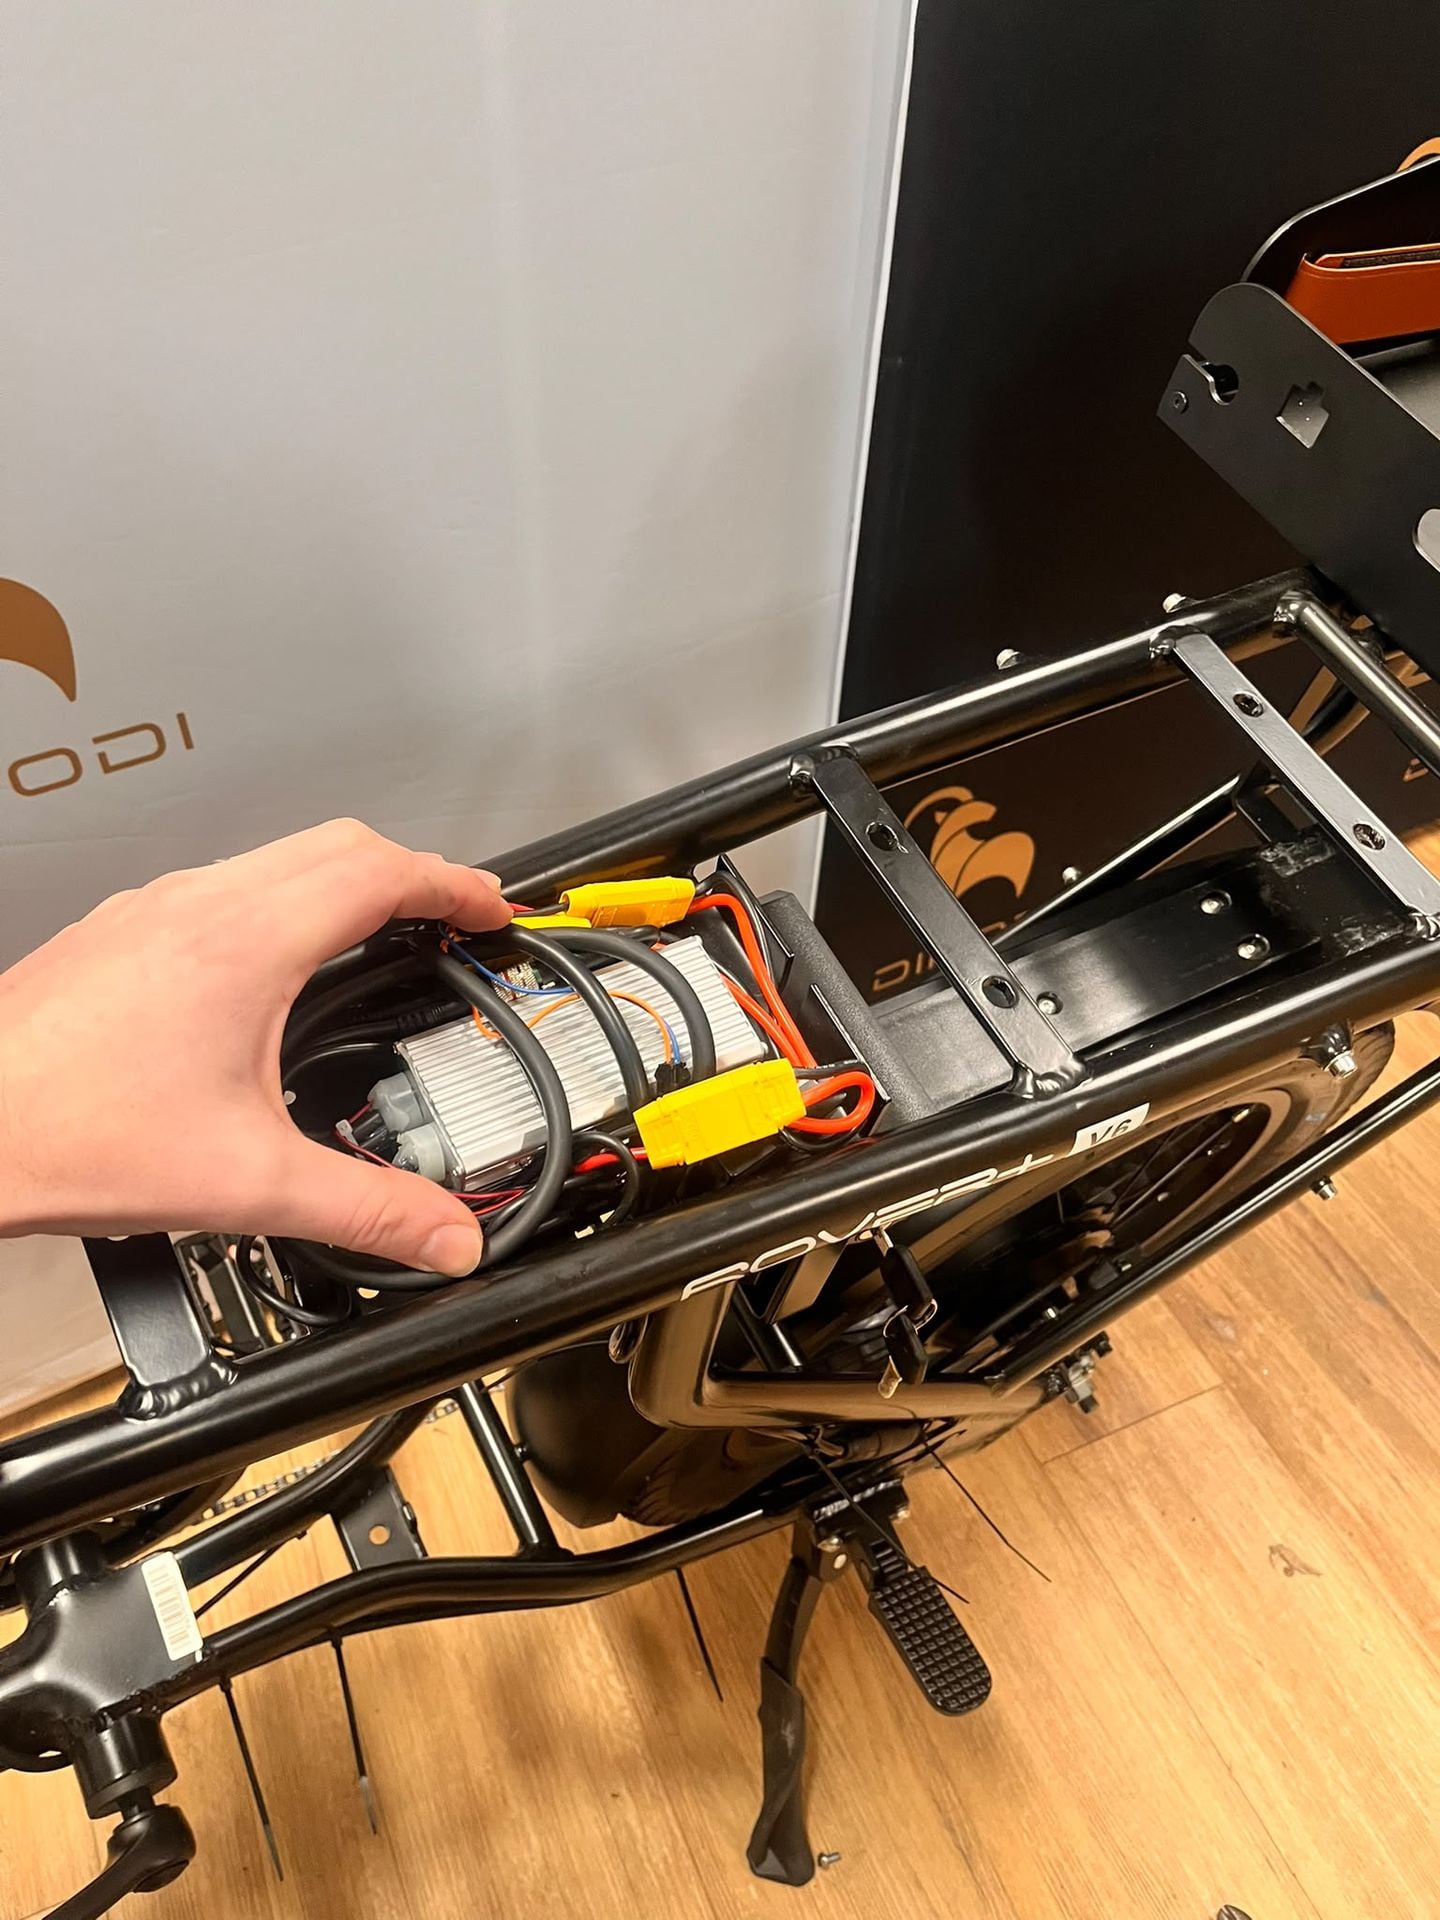
Step 4: Install Battery Balancer Inline to all XT90 connectors
-Install the battery balancer module inline to the XT90 plugs. It cannot be done incorrectly as the controller connects with 1 polarity and the other 2 plugs match any battery polarity connection. Plug either battery, start with main battery into battery balancer spare XT90 as it is close by.
Example image below with XT90 connectors labelled. Note it's impossible to get this wrong, just plug everything together.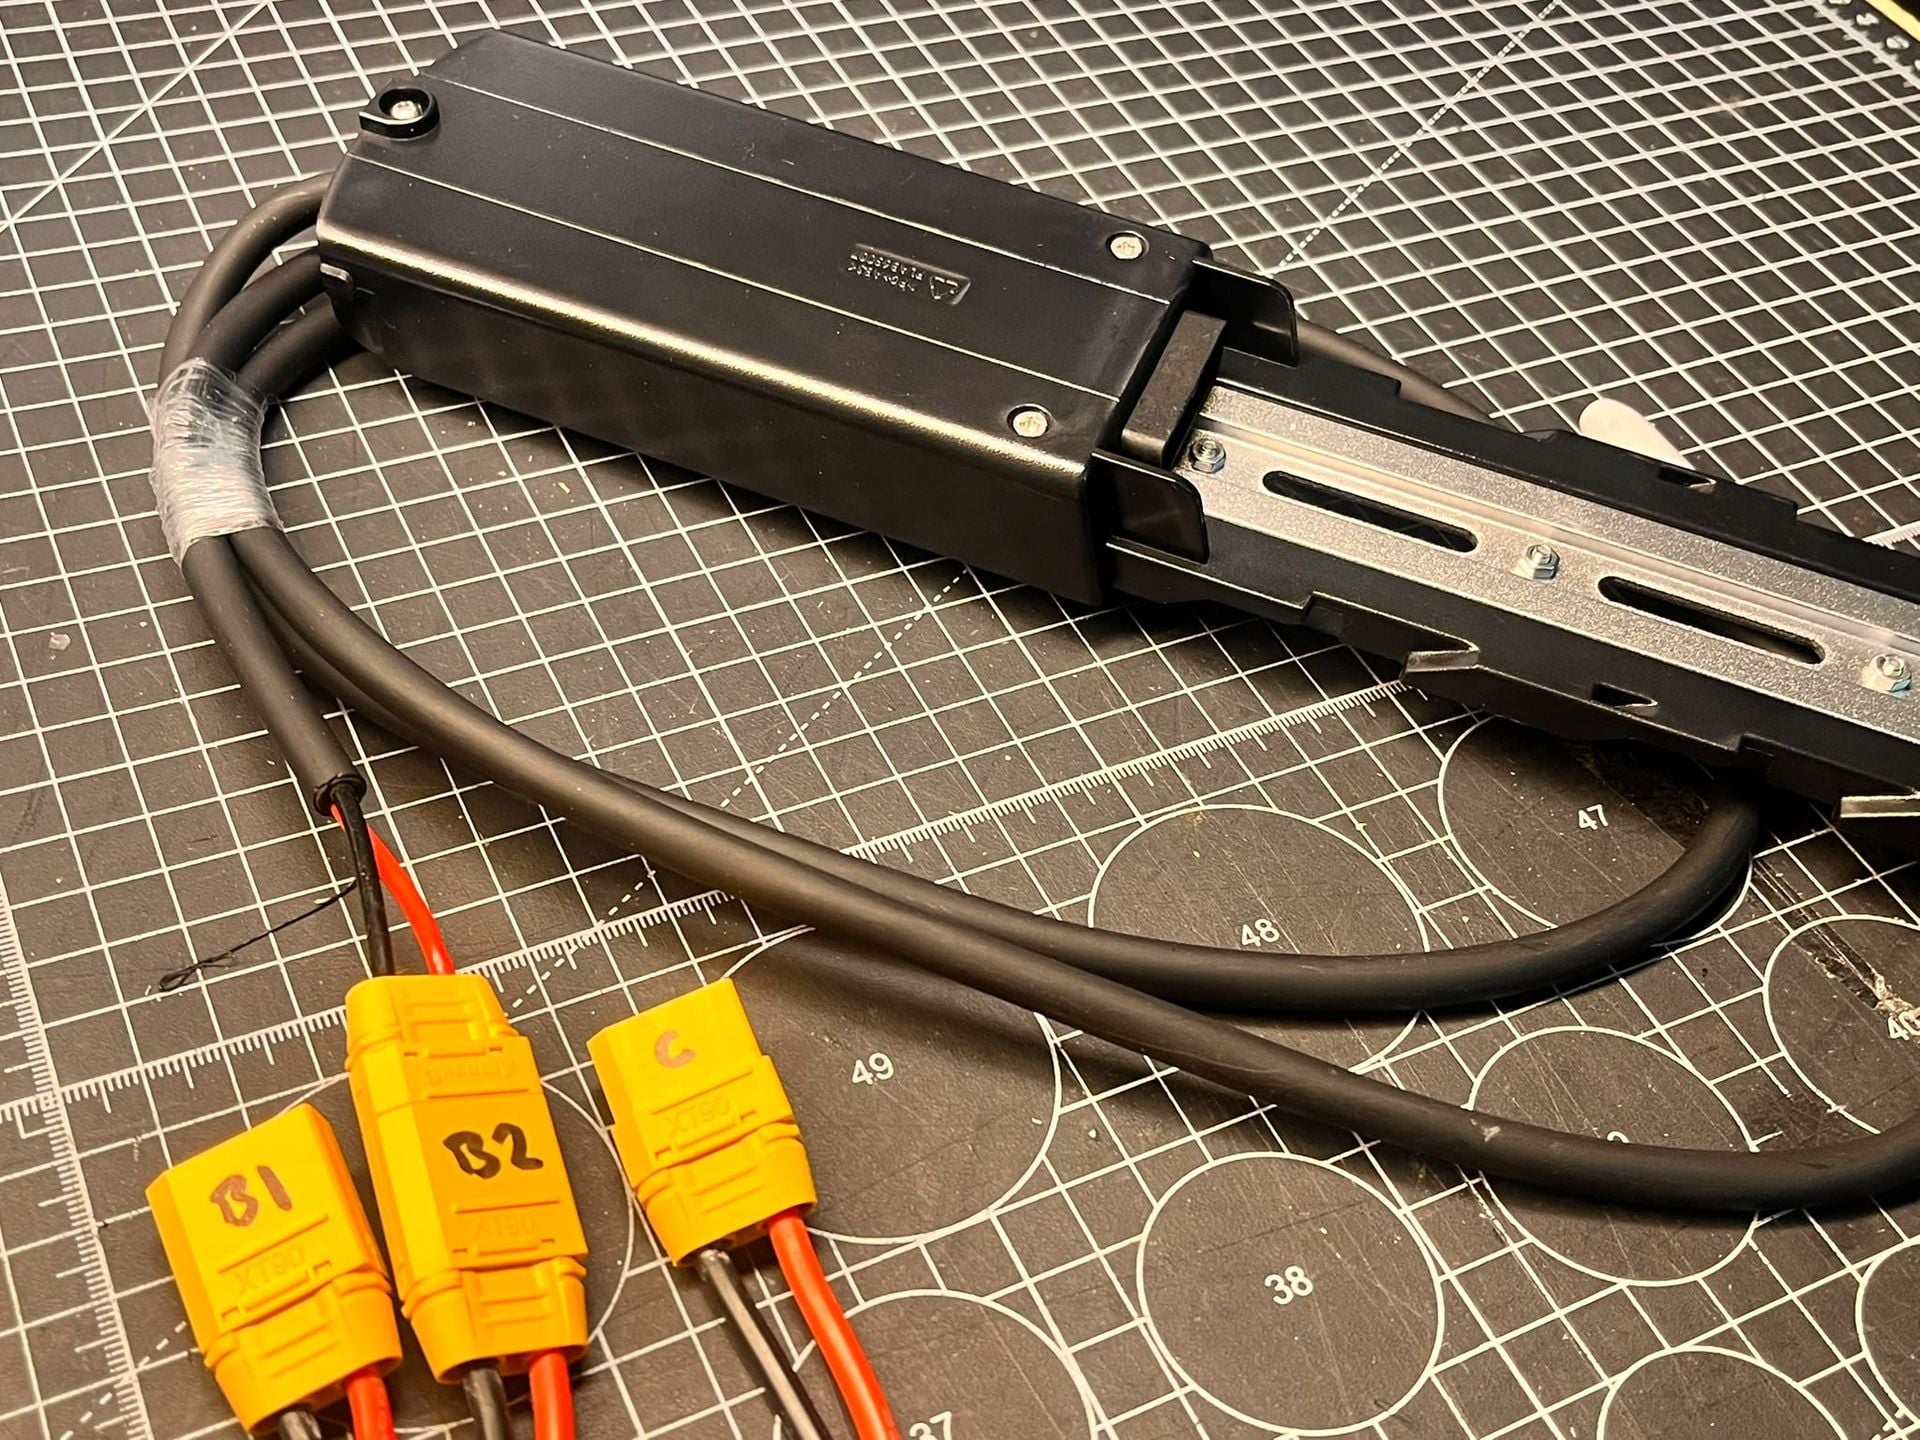
Step 5: Slide on 2nd Battery to downtube
-Install battery and lock with key (Turn key left to lock)
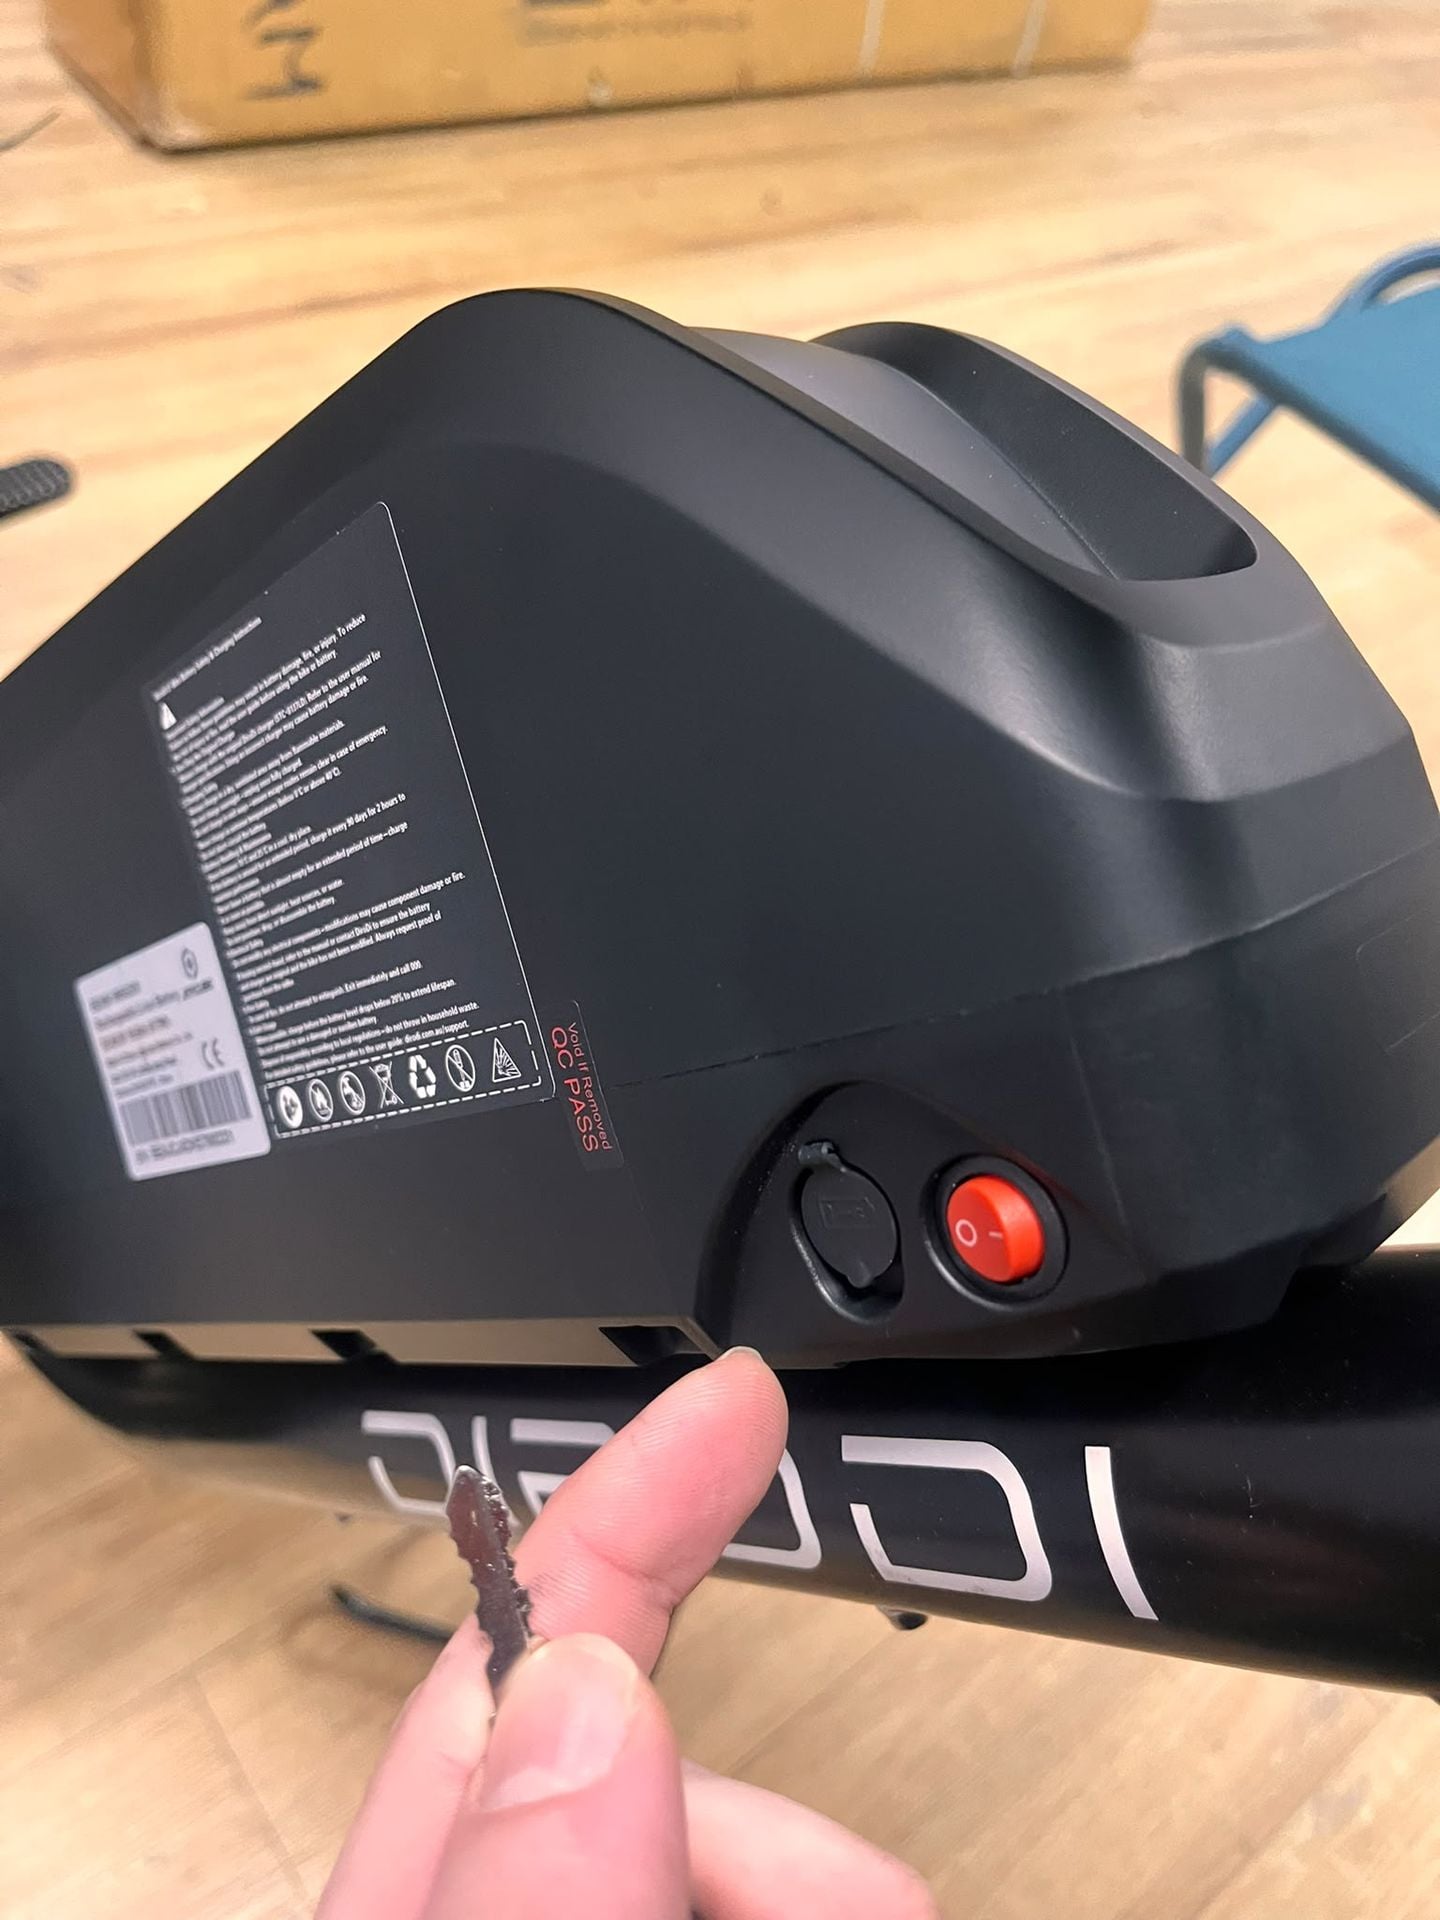
-Both battery switches to be switched to ON
-Switch the bike on and confirm bike works as intended, true test is range test.
-IMPORTANT: Please read the final notes on aftercare and bike sitting idle instructions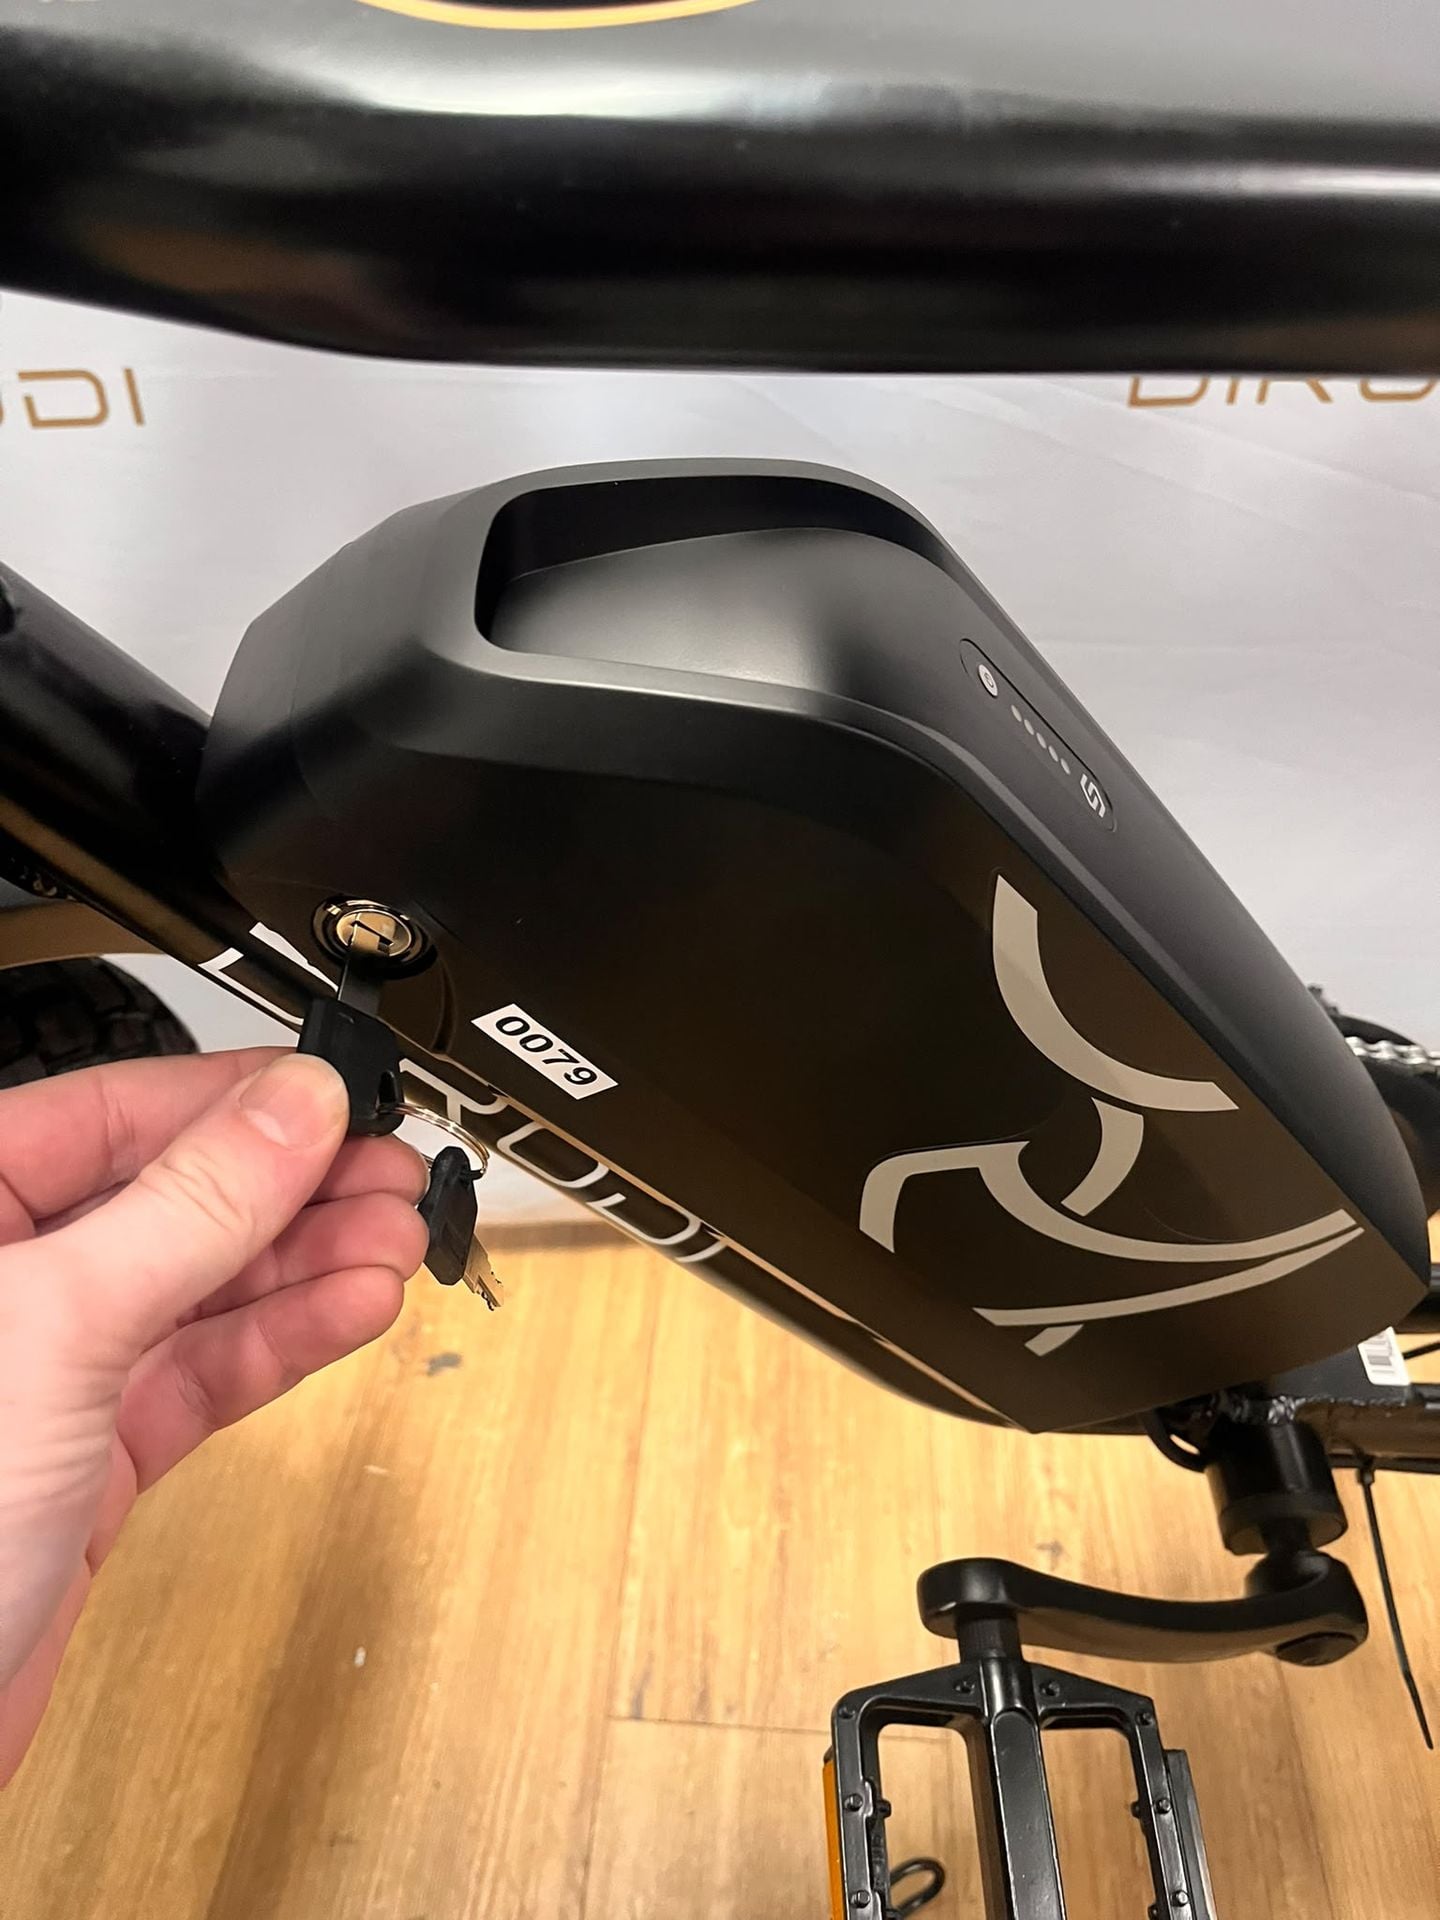
Final Notes:
-For bike storage and for all times when not actively riding the bike it is crucial to have both battery red switches to be switched OFF.
-Same instructions for charging, if you do or do not remove batteries for charging, please ensure when charging, the RED battery switches must be OFF (icon for OFF = O, icon for ON = I)
-It is possible to only have 1 battery switched on to operate the system, but the system is intended to use both batteries simultaneously with the battery balancer managing keeping the battery voltage level.
-It is sometimes a user preferece to remove the 2nd battery to make the bike weigh 5.5kg less, to leave the 2nd battery at home for the whenever that is needed.